• Browse
    • Search
    • Recs
Menu
  • Browse
    • Search
    • Recs
Generic selectors
Exact matches only
Search in title
Search in content
Search in posts
Search in pages
  • Browse
    • Search
    • Recs
Menu
  • Browse
    • Search
    • Recs
  • Recs
    • Browse
    • Search
Menu
  • Recs
    • Browse
    • Search
Generic selectors
Exact matches only
Search in title
Search in content
Search in posts
Search in pages
  • Get Started
  • Documentation
  • Integration Docs
  • FAQ
Menu
  • Get Started
  • Documentation
  • Integration Docs
  • FAQ

Down Arrow up_Arrow_active Recommendations

Recs Features

  • Features
  • Advantages

Dimensional Mapping

  • Mapping the fields

Down Arrow up_Arrow_active Algorithms

Core Algorithms

  • Recommended For You
  • Top Sellers
  • Category Top Sellers
  • Brand Top Sellers
  • Bought also Bought
  • Viewed also Viewed
  • More Like This
  • Recently Viewed
  • Complete the Look
  • Cross-Sell

Custom Algorithm

  • About Custom Algorithms

Down Arrow up_Arrow_active Merchandising

Hybrid Algorithms

  • About Hybrid Algorithms

Filters

  • Managing Filter Rules

Fallback

  • Managing Fallback

Down Arrow up_Arrow_active New Templating

New Recs Templating

  • About Hybrid Algorithms

Down Arrow up_Arrow_active Experience

Campaign Management

  • Campaign Creation

Down Arrow up_Arrow_active User Management

User Management

  • User Profile
  • Manage Site
  • Manage Organization

Down Arrow up_Arrow_active Reports

Reports

  • Overall Performance
  • Site Reports
  • Page-Type Reports
  • Widget Reports

User Management

The logic behind each of these core algorithms can be used as-is for product discovery and, as a merchandiser, you can blend and mix logic to create hybrid algorithms. Core algorithms establish relationships between one or more products or a user with related products. 


In other words, core algorithms like Recommended For You, Viewed Also Viewed, More Like This, and Bought Also Bought help merchandisers with a core set of logic to power a personalized shopping experience for your shopper.

User Profile

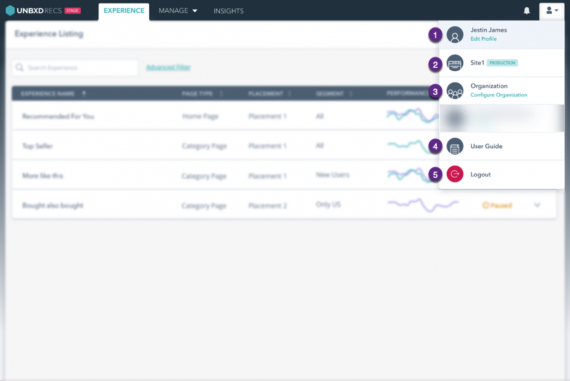
Unbxd allows you to manage your Recommendations console settings.


#

Label

Description

1

Manage User

This allows you to view and modify your user profile settings. You can change your profile picture and reset your password.
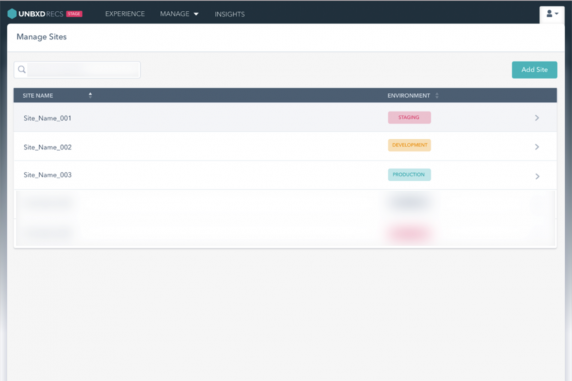
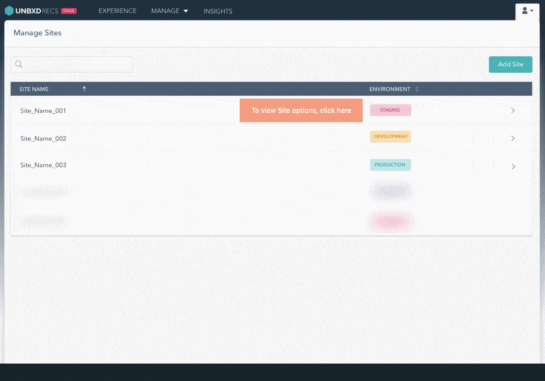
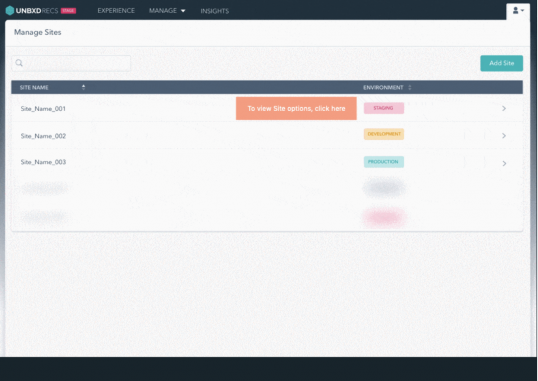
2

Manage Site

This allows you to view and add sites. 

For more information on this section, refer to Manage Site. 

3

Manage Organization

This allows you to add, edit, and delete users. 

For more information on this section, refer to Manage Team.

4

Support

Shortcut to product documentation, video tutorials and interactive guides.

5

Log Out

Shortcut to log out of Unbxd Recommendations console.

Manage Site

Site (User Profile > Manage Site) allows you to add and manage environments from the Console. 

The different environments available are:

  • Development
  • Staging
  • Production

NOTE: You can add a user only after you’ve created a site.

To add a site:

  1. Within Sites, click Add Site. The Add New Site window appears.
  2. Type in the web URL of the environment you want to add in the Add website URL text field.
  3. To select a region, click the Region drop-down box and select the required region. Regions available are:
    • US 
    • Singapore
  4. To select an environment, click the Environment type drop-down box and select the required environment. 
  5. Click Add.

You’ve successfully added a site to your console. 

Each site will have a unique site key and associated set of API keys. Apart from this, you can also: 

  • Integrate using AJAX
  • Manage your catalog
  • Map Fields

Manage Organization

Organization (User Profile > Manage Organization) allows you to add, modify, and delete team members from Console.

There are four types of users:

  • Merchandiser
  • Finance Manager
  • Category Manager
  • Developer

Future versions will allow you to view and manage payments and set up your organization’s profile.

To add a team member: 


  1. Within Organization, click Add User. The Add New User window appears.
  2. Type in the email address of the new user in the Email ID text field.
  3. To select the site the user will have access to, click the Site drop-down box and select the required environment. 
  4. To select the role of the user, click the Role drop-down box and select the required role. Users can have different levels of access to different sites. To add sites and specify permissions, click the Add icon and repeat steps 3 and 4.
  5. Click Add. An invite is emailed to the user.

You’ve successfully added a user to your console.

  • Did this answer your question?
  • Yes!

    Nice work, I love it.

    Feedback is submitted

On this Section

  • Automatic Synchronization
  • Manual Synchronization
  • Command Line Interface
  • Manual Upgrade
  • Upgrade via Composer

Copyright 2020 © Unbxd Inc, All Rights Reserved. Privacy Policy